Now that we have 2 sensors built and collecting data (PIR Motion Sensor & Distance Sensor, both built on Raspberry Pi) we should start doing something with the data. In more of a real-world scenario, we would have some sort of a backend to collect this data, place it in a data warehouse and then be able perform analysis on the data being retrieved. Or at the very least, display the data in perhaps a dashboard of some kind.
But it all starts with data. Let’s start by building a RESTful API that we will use to collect the information from the sensors. We will build our API in NodeJS, on top of the Express middleware. We can either run this on a computer, like a desktop or laptop, or even on another Raspberry Pi!
We’ll start by running a development environment on our local machine. We can then deploy to a Raspberry Pi or a server.
Getting Started – Building a RESTful Sensor API locally
Make sure you have NodeJS & npm installed on your local machine. You can download it by going to the NodeJS website and selecting the latest installer for your operating system.
It would also help to have a code editor, such as Notepad++, VSCode Free, Sublime Text, or your favorite code editor. (I prefer VSCode, but that is just preference.)
Fire up the editor, and either download the github repo as provided below. Or else, code along with me from scratch. If you are starting off from scratch, create a new file called “server.js” in a folder and open it in the code editor.
From a command line, navigate to the same folder as you created server.js. Type:
npm init
This will initialize a base node application. Answer the prompts, and for the entrypoint, type in server.js. Here’s what I typed in:
$ npm init
This utility will walk you through creating a package.json file.
It only covers the most common items, and tries to guess sensible defaults.

See `npm help init` for definitive documentation on these fields
and exactly what they do.

Use `npm install <pkg>` afterwards to install a package and
save it as a dependency in the package.json file.

Press ^C at any time to quit.
package name: (api) api
version: (1.0.0)
description: REST API for sensor data
entry point: (server.js) server.js
test command:
git repository: https://github.com/dagobah19/sensor-backend.git
keywords:
author: knowgenie.com
license: (ISC)
Review and confirm by typing in “yes” when prompted. This will create the package.json file. Now let’s start by installing some dependencies. From the same command line, type the following:
$ npm install -s express cors body-parser
+ cors@2.8.5
+ body-parser@1.20.1
+ express@4.18.2
added 2 packages from 2 contributors, updated 2 packages and audited 60 packages in 2.391s
found 0 vulnerabilities
Note that we can install several packages at the same time by simply separating them by a space. The -s flag will save the dependency in the package.json file. If you open that file, you will see them added under the “dependencies” section. Anytime you install packages they are added to your package-lock.json file, which contains all the packages, requirements, and versions needed as well as the URL to download them. Think of this file as a manifest that has all the details needed to build the platform for your application.
We’re finally ready to code. The express Middleware makes it very straightforward to build an API endpoint, or multiple API endpoints for our needs.
NodeJS server code to implement the API
Here is the code:
const url = require('url');
var express = require('express');
var cors = require('cors')
var app = express();
const bodyParser = require('body-parser');
const port=3001
//allow CORS for all requests
app.use(cors())
app.use(bodyParser.json());
app.use(bodyParser.urlencoded({ extended: true }));
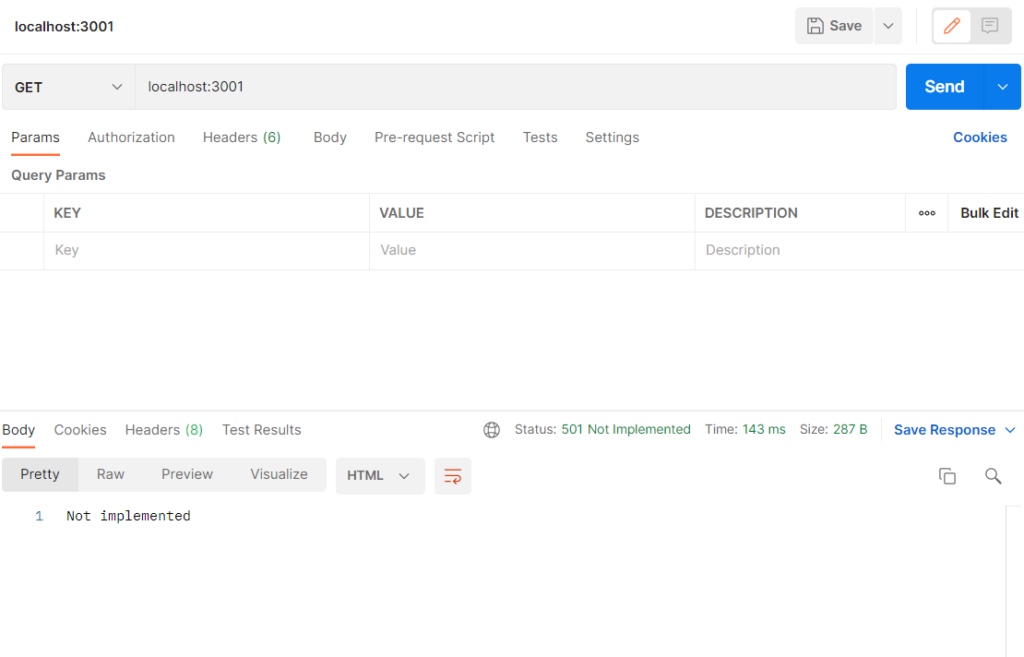
app.get('/', function (req, res) {
res.status(501).send('Not implemented');
});
app.post('/sensordata/:sensor', function(req,res){
var data=(JSON.stringify(req.body.data)).replace(/\"/g, '\'');
console.log("Data Received: "+data)
res.send(data)
})
app.use(function(req, res, next) {
res.status(404).send("Not Found");
});
// start server on port
app.listen(port, function () {
console.log('Server app listening on port ' + port);
});Lines 1-7 are defining some variables we will need. We require the node modules and assign them variables so we can access their functions and properties in our application. We also define “app” as our express application. Finally, we define port 3001 as our port that the API will be running on. Typically a NodeJS app runs on port 3000. You can make this almost anything you want.
Cross Origin Resource Sharing – the bane of some developer’s existence
Typically, for security purposes, a program requesting information across the HTTP / HTTPS protocols needs to reside in the same domain as the resource. This is done to prevent malicious scripts from being downloaded or accessed across domains/computers/systems. This will get in our way and prevent the sensors, or even a web console or dashboard from the same domain (but different subdomain), from sending or receiving data to or from the API.
We can get around this by manipulating the headers accepted and sent in our API server. The easiest way to do this is to install the cors package. We then allow our app to use the cors middleware to allow everything. Now obviously this isn’t best practice, but for our purposes it is going to be good enough for now (especially because we are going to be on a private network anyway with no internet access – leaving a small vulnerability / attack vector).
Body parsing and our API endpoints
We setup our express app to use the bodyparser so we can access the information in the message that will get sent to us from the sensors. By using the bodyparser.json(), we are telling bodyparser that we are expecting the information to be in json format.
We’re now ready to define our endpoints. We’re going to start with a single endpoint to receive our sensordata.
app.post('/sensordata/:sensor', function(req,res){
    var data=(JSON.stringify(req.body.data)).replace(/\"/g, '\'');
    console.log("Data Received: "+data)
    res.send(data)
})When data is posted to /sensordata/:sensor, we are going to assign the value of body.data to the data variable. JSON.stringify is used to make the object into a string so it can be accessed and read. We are also replacing the double quotes with a single quote. We are then logging the data received, and sending it back to the sensor as a response.
Think of the :sensor notation as a parameter, whatever is passed as :sensor will become our sensor. So /sensordata/myfirstsensor will have “myfirstsensor” as the value of the sensor parameter.
The “ret” and “res” are objects that are used in the callback to the post – req holds the request, and res represents the response.
We’ll tidy up a little bit and add an endpoint for a root ‘/’ request.
app.get('/', function (req, res) {
    res.status(501).send('Not implemented');
});This way, if the API is accessed without anything else, we will return a 501 response status code.
Likewise, it’s also a good idea to add a generic “not found” handler:
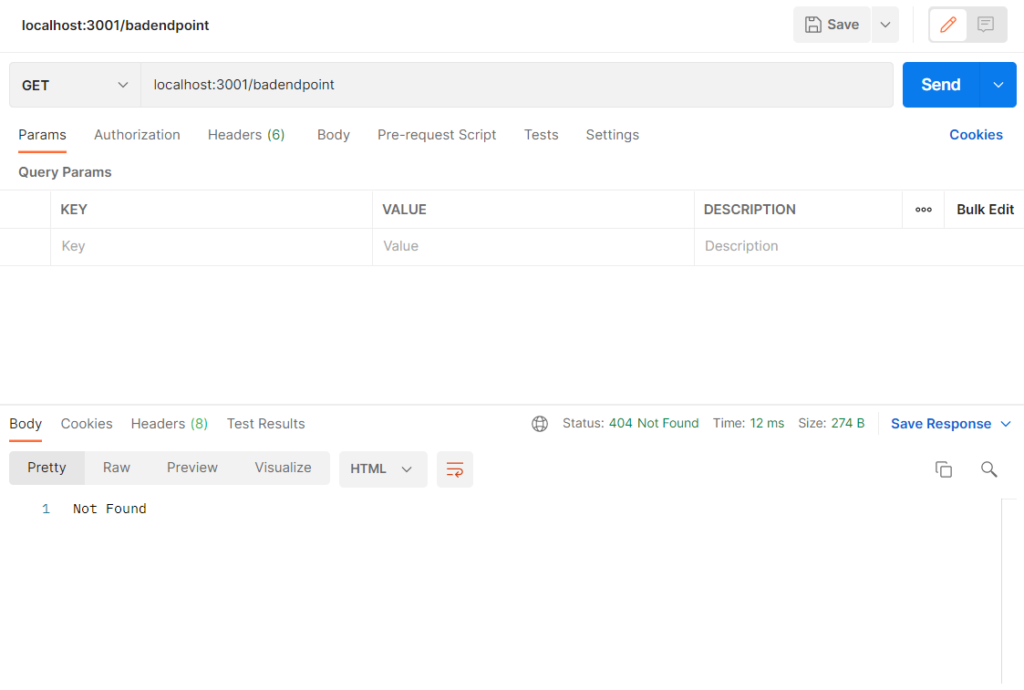
app.use(function(req, res, next) {
    res.status(404).send("Not Found");
});If an attempt is made to reach an API endpoint that we haven’t created yet, we simply return a 404 response status code.
You can follow the commit on github.com
Testing our RESTful Sensor API
Before modifying any code on the sensors to start sending the data, we want to test it first locally.
The first test would be to start the server to make sure we didn’t screw up any code. Do this by typing npm start:
$ npm start

> api@1.0.0 start C:\test\sensor collector\api
> node server.js

Server app listening on port 3001
No errors, we are good to start the test.
We will be testing using Postman, but you can use any API testing tool you want. First, we try to access the base URL and test our first fallback case:
Now lets test the second fallback case, and access an endpoint that doesn’t exist.
Finally, let’s test with some data. We will make up a sensor name and pass some random data to it.
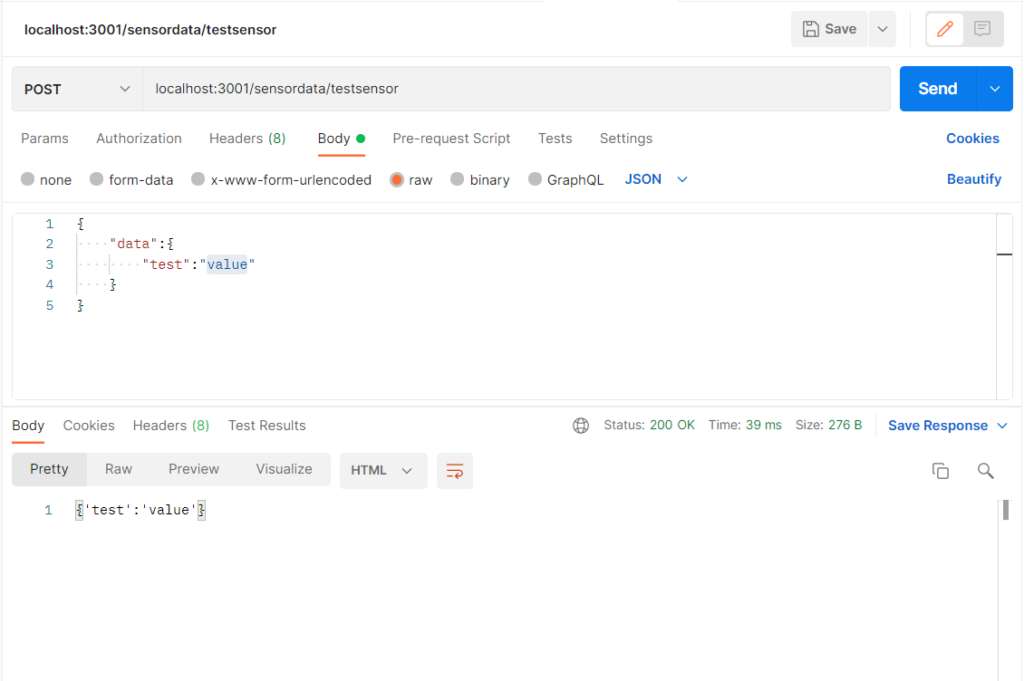
Notice that we changed the method to “POST”, and changed our body from none to raw. Then we selected JSON from the dropdown to send JSON data to the API. The API responded with a 200 OK message and sent us back the data.
> node server.js

Server app listening on port 3001
Data Received: {'test':'value'}
We terminate our API by pressing Ctrl-C.
Next Steps for our RESTful Sensor API
In this post, we built a simple API that accepts sensor data and echoes it back to the caller. This is a great start, but not overly useful. In the next post in this series we will store the sensor information by saving it in a database. Then we can perform analysis on the data later and display it.
Nice. Where is the next part?