
How to Build a Real 100% working Laser Gun from a Nintendo Zapper, Part 1
Why should we do this?
There are two types of people who will read this. One group will say “Why?” and the other will say “Why not?”
If you find yourself asking “Why”, then chances are you won’t make it past this introduction. You will find no interest in these pages, other than repeating to yourself “why” over and over again.
Why would you do such a thing? Why did you do this? Why would you build a real 100% working Laser Gun from a Nintendo Zapper? Can’t you find something else to do? What a waste of time, effort, money…time…
Such people would look at the end result and say “You could blind yourself, or hurt yourself, or get killed, or kill someone…”
On the other hand, those like me who say “why not” – well, we know better. We know better than to try and argue with the first group. Because if you ask “why”, you will never know the answer to “why not”.
Let’s face it. Yes, you could get blinded, killed, hurt, or hurt others with this. However, you could get killed, hurt or blinded today in a wider variety of unrelated and separate instances, like walking the dog, crossing the street, going to work, making dinner, opening a can of Spaghetti-o’s, or getting it on tonight (if you’re luckier than I).
And so, let’s begin.
DISCLAIMER: This is a dangerous project intended for mature audiences and for informational purposes only. Intentional misuse can result in bodily harm or injury to yourself or others, including animals. The author of this post and this site assumes no liability for your actions.
Parts List
- 1x Nintendo Zapper gun
- 1x 445nm 1.5-2w laser diode
- 1x diode heatsink
- 1x glass lens
- 1x laser driver
- Wires (18AWG – 22AWG will work fine)
- 1x (or more) rechargeable batteries
- Electronic key lock
Tools you will probably need
- Soldering Iron
- Desoldering Iron (optional, but helps)
- Solder
- Wire stripper & cutter tool
- Philips screwdriver
- Mini screwdriver set
- Goggles / protective glasses
- Laser glasses for 445nm laser (You NEED this. Don’t cheap out. Get a good pair – the laser is so bright and powerful it WILL PERMANENTLY damage your eyes if you don’t have good glasses!!!)
Step 1: Observing a moment of silence prior to disassembly
Marvel at the beauty of the zapper gun, in all its 1980’s glory. It will soon become your weapon of destruction.
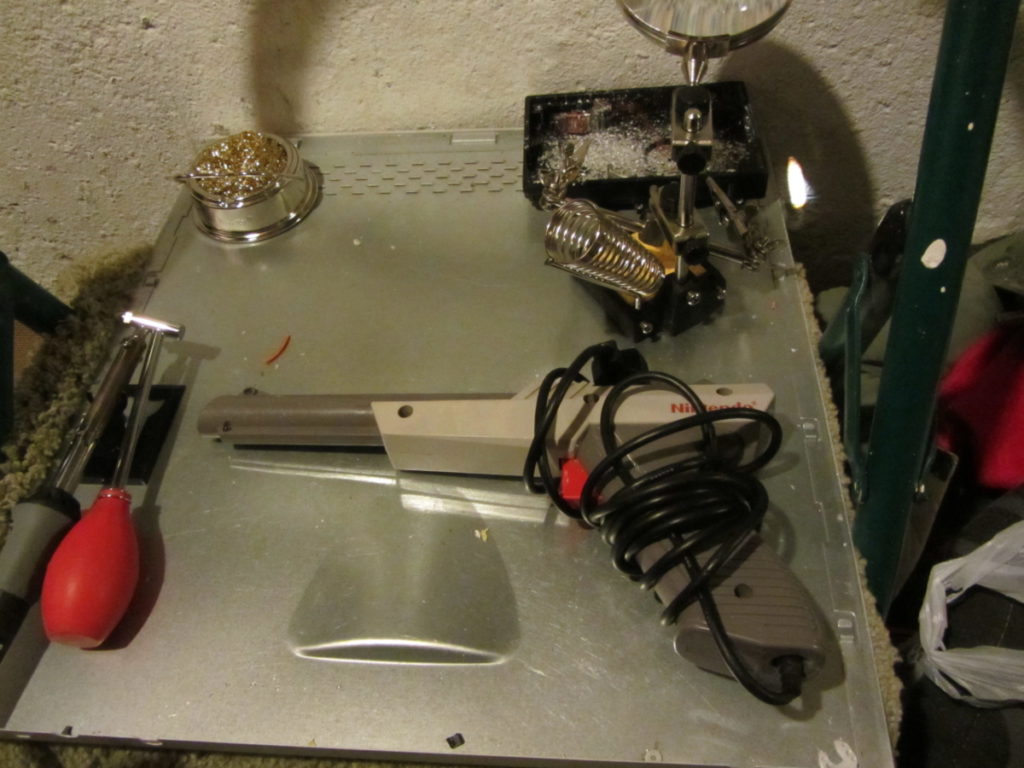
You’ll basically be disassembling the unit, removing the current electronics and replacing most of them with a laser diode, driver, power supply and some wiring. If you are squeamish about destroying a piece of your childhood, perhaps you should stop now and play Duck Hunt and pretend you can actually zap that damn dog when he snickers at you.
Step 2: Remove screws and disassemble the Nintendo Zapper gun
Not much to talk through on this one. Take your screwdriver and get to unscrewing.
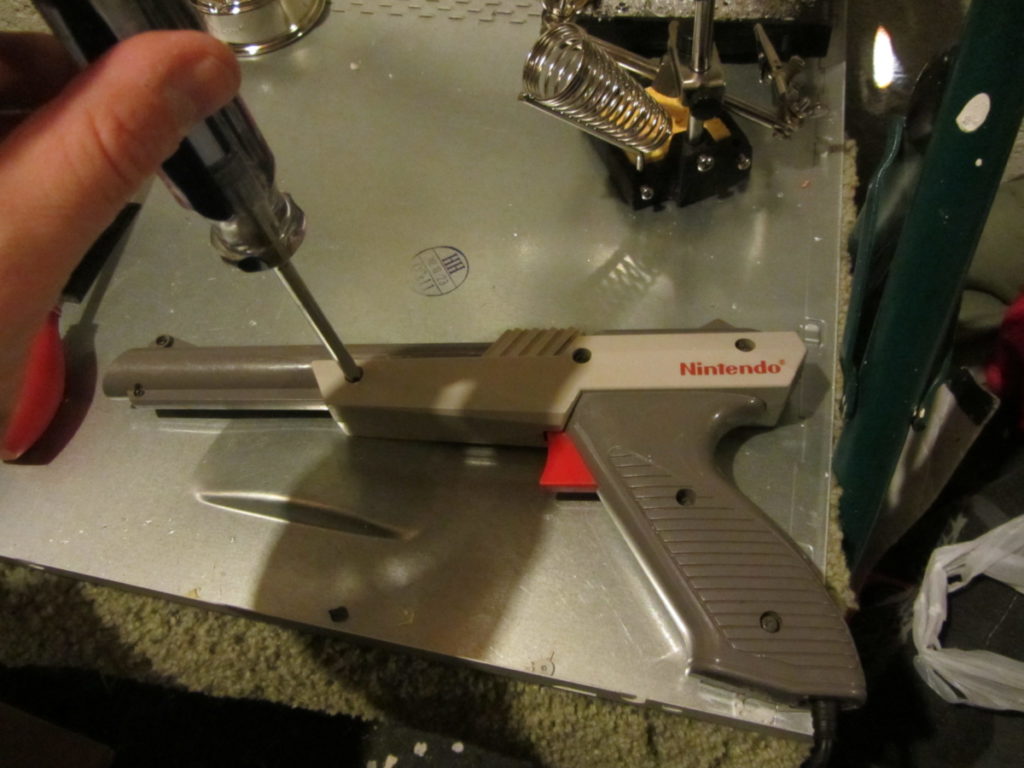
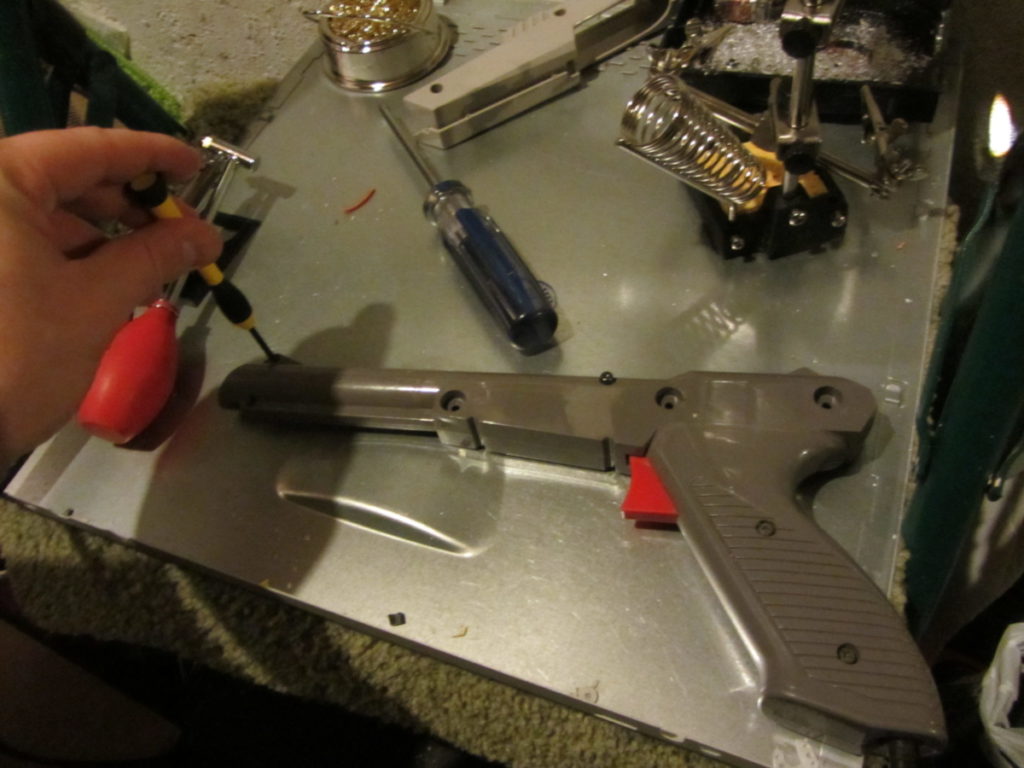

This should go without saying, but same the screws. Also, take a moment to behold the inner workings of the gun that caused you so much pleasure and pain during your childhood.
In Part 2 of Building a real 100% working Laser Gun from a Nintendo Zapper, we’ll start ripping out the components, and create the trigger for our new weapon.